Tremendous Simplification of SpringBoot Development with TestContainers
A couple of weeks ago, Spring Boot 3.1.0 has been released, and it contains some tasty features. In this article, we’ll focus on the brand-new built-in integration with TestContainers. This feature brings great flexibility to developers running Spring Boot Apps on localhost.
@Bean
@RestartScope
@ServiceConnection(name = "redis")
public GenericContainer redisContainer() {
    return new GenericContainer<>(REDIS_IMAGE)
            .withExposedPorts(6379)
            .withReuse(true)
            .withCreateContainerCmdModifier(cmd -> {
                cmd.withName("redis");
                cmd.getHostConfig()
                        .withMemory(memoryInBytes)
                        .withMemorySwap(memorySwapInBytes);
            });
   ...
}
In the first part, we’ll build a heavily-integrated SpringBoot App that uses Kafka, Postgres, Redis, and a simple Flask web app. Nothing fancy. In the second part , we’ll build the infrastructure in Java to run the application and all the linked services with a simple Gradle command. Finally, we will see some additional appetizing features and configs.
As always, all code is available in this public GitHub repository.

Photo by Nano Do on Unsplash
The Spring Boot App
– Postgres –
Our application will perform simple CRUD operation reading and persisting data from a Postgres Database. First things first, let’s see the required dependencies:
implementation 'org.springframework.boot:spring-boot-starter-data-jpa'
runtimeOnly 'org.postgresql:postgresql'
Secondly, we need to specify the initialization mode in the application.properties file:
spring.sql.init.mode=always
And some init scripts to put in the resource folder.
The schema.sql file:
create table if not exists customer(
   id   serial primary key,
   name varchar(255) not null
);
The data.sql file:
delete from customer;

insert into customer(name)
values ('Polp');
insert into customer(name)
values ('Tano');
...
Finally, we need the Entity and the Repository classes:
@Repository
public interface CustomerRepository extends ListCrudRepository<Customer, Integer> {
    List<Customer> findByNameIgnoreCase(String name);
}

@Entity
public class Customer {
    @Id
    private Integer id;
    private String name;
}
Remember to specify the package where Spring Boot can find the Entities using the right annotation:
// Other annotations
@EntityScan("gae.piaz.springtc.data")
public class Application {
     public static void main(String[] args) {
    SpringApplication.run(Application.class, args);
}
– Kafka –
The integration with Kafka is simple and straightforward. This is the only dependency we need:
implementation 'org.springframework.kafka:spring-kafka'
Let’s define the Consumer and Producer properties in the application.properties file:
spring.kafka.producer.key-serializer=org.apache.kafka.common.serialization.StringSerializer
spring.kafka.producer.value-serializer=org.springframework.kafka.support.serializer.JsonSerializer
spring.kafka.consumer.group-id=tc
spring.kafka.consumer.auto-offset-reset=earliest
spring.kafka.consumer.key-deserializer=org.apache.kafka.common.serialization.StringDeserializer
spring.kafka.consumer.value-deserializer=org.springframework.kafka.support.serializer.JsonDeserializer
spring.kafka.consumer.properties.spring.json.trusted.packages=gae.piaz.*
And of course, we need a Producer and a Consumer for our “customers” topic. In this case, we have both producer and consumer in the same service, for simple testing purposes:
@Service
@RequiredArgsConstructor
@Slf4j
public class CustomerEventPublisher {
private final KafkaTemplate<String, Object> kafkaTemplate;

    public void publishCustomerCreatedEvent(CustomerDTO data) {
        kafkaTemplate.send("customers", data);
        log.info("CustomerCreatedEvent sent to products topic");
    }
}

@Service
@RequiredArgsConstructor
@Transactional
@Slf4j
class CustomerEventListener {

    private final CustomerRepository customerRepository;

    @KafkaListener(topics = "customers")
    public void handleCustomerCreatedEvent(CustomerDTO customerDTO) {
        log.info("Customer event received from customer topic");
        Customer customer = new Customer();
        customer.setId(customerDTO.id());
        customer.setName(customerDTO.name());
        customerRepository.save(customer);
    }

}
– Redis –
In this case, we want to use using Redis as a caching layer. So we just need to add these two spring-boot-starter dependencies to the build.gradle:
implementation 'org.springframework.boot:spring-boot-starter-cache'
implementation 'org.springframework.boot:spring-boot-starter-data-redis'
Define some magic Java config:
@Configuration
public class RedisConfig {

    public final static String CUSTOMER_CACHE = "customerCache";

    @Bean
    public RedisCacheConfiguration cacheConfiguration() {
        return RedisCacheConfiguration.defaultCacheConfig()
                .entryTtl(Duration.ofMinutes(60));
    }

    @Bean
    public RedisCacheManagerBuilderCustomizer redisCacheManagerBuilderCustomizer() {
        return (builder) -> builder
                .withCacheConfiguration(CUSTOMER_CACHE,
                        RedisCacheConfiguration.defaultCacheConfig()
                .entryTtl(Duration.ofMinutes(5)));
    }

}
Enable caching with the right annotation:
// Other annotations
@EnableCaching
public class Application {
    public static void main(String[] args) {
    SpringApplication.run(Application.class, args);
}
And use the @Cacheable annotation where we need it. In this case, we’ll cache a CustomerDTO object:
@Service
@RequiredArgsConstructor
@Slf4j
public class CustomerService {

    private final CustomerRepository customerRepository;

    @Cacheable(RedisConfig.CUSTOMER_CACHE)
    public List<CustomerDTO> findByName(String name) {
        log.info("------ Hitting database & not using cache! ------ ");
        return customerRepository.findByNameIgnoreCase(name).stream().map(customer ->
                new CustomerDTO(customer.getName(), customer.getId())).toList();
    }

    // ...
}
– Flask Application –
The integration with the Flask application from the point of view of the Spring Boot App is nothing else than a simple Rest call:
@Service
@RequiredArgsConstructor
@Slf4j
public class CustomerService {

    public List<CustomerDTO> findExternal() {
        String url =
                env.getProperty("external.server.host") +
                        env.getProperty("external.server.port") +
                        "/customers";

        RestTemplate restTemplate = new RestTemplate();
        ResponseEntity<CustomerDTO[]> extCust = restTemplate
            .getForEntity(url, CustomerDTO[].class);
        return Arrays.asList(extCust.getBody());
    }

    // ...
}
Reading host and port from the application.properties file:
external.server.host=${EXTERNAL_CUSTOMER_SERVICE_HOST:http://localhost:}
external.server.port=${EXTERNAL_CUSTOMER_SERVICE_PORT:8080}
We will see why we are using System Variables in the “additional-config” part of the article. If you are guessing that the variable will be set at runtime to hit a TestContainer, you are right!
Local Development with TestContainers
Adding new features or fixing some bugs with this highly integrated Application might be difficult for all the services that we need to mock and exclude, or for all the configurations that we need to tune to connect to remote hosts.
With TestContainers built-in integration provided in SpringBoot 3.1, starting our Application with all 4 containers needed it’s super simple, and we don’t have to change any configuration to make it work like a charm.
First of all we need to import the right dependencies:
testImplementation 'org.springframework.boot:spring-boot-starter-test'
testImplementation 'org.springframework.boot:spring-boot-testcontainers'
testImplementation 'org.testcontainers:kafka'
testImplementation 'org.testcontainers:postgresql'
Now we can define a new TestApplication Class. The name of the class should be placed in the same package as the Main Application (but in the Test folder) and should be named Test-NameOfApplication:
public class TestApplication {
    public static void main(String[] args) {
        SpringApplication
                .from(Application::main)
                .run(args);
    }
}
We can run this application by “executing the main” through any IDE, or we can run the gradle command “bootTestRun”.
Let’s focus on the tasty part now. Let’s define our Containers using ONLY Java code.
First of all, we need to use additional Container classes to avoid the “Raw use of parameterized class ‘GenericContainer’“ error. This is because Test-Container uses a self-typing mechanism to make fluent method works with extended classes: https://stackoverflow.com/a/57077189. It’s not mandatory, and probably we will not need this in future versions of TestContainers, but we want to keep our IDE without warnings (that yellow underline can hurt eyesight):
class PostgresContainer extends PostgreSQLContainer<PostgresContainer> {
    public PostgresContainer(DockerImageName image) {
        super(image);
    }
}

class RedisContainer extends GenericContainer<RedisContainer> {
    public RedisContainer(DockerImageName image) {
        super(image);
    }
}

class PythonContainer extends GenericContainer<PythonContainer> {
    public PythonContainer(ImageFromDockerfile image) {
        super(image);
    }
}
We don’t need a custom KafkaContainer class because it’s the only provided container that is using generics correctly.
Now we can define Container Bean classes handled entirely by the Spring Context (container start and stop included):
@Configuration
public class TestContainerConfig {

    public static final DockerImageName POSTGRES_IMAGE =
        DockerImageName.parse("postgres:15.1-alpine");

    @Bean
    // @org.springframework.boot.devtools.restart.RestartScope
    @ServiceConnection(type = JdbcConnectionDetails.class)
    public PostgresContainer postgresContainer() {

        final long memoryInBytes = 64L * 1024L * 1024L;
        final long memorySwapInBytes = 128L * 1024L * 1024L;

        return new PostgresContainer(POSTGRES_IMAGE)
                .waitingFor(
                    Wait.forLogMessage(".*PostgreSQL init process complete;.*\\n", 1))
                .withReuse(true)
                .withCreateContainerCmdModifier(cmd -> {
                    cmd.withName("postgres");
                    cmd.getHostConfig()
                            .withMemory(memoryInBytes)
                            .withMemorySwap(memorySwapInBytes);
                });
    }

    // ...
}
@ServiceConnection is the brand-new annotation that will create all applicable connection details beans for a given Container. For example, a PostgreSQLContainer will create both JdbcConnectionDetails and R2dbcConnectionDetails. In this case, we just need the JDBC connection. We don’t need to configure any host, port, password or any proxy!
It’s a good practice to also provide custom names to containers, and thanks to the CMD modifier we can also set a memory limit. As you might imagine, this is useful if we need to start dozens of TestContainers on the same host. Additionally, this container will be considered as ready when the LogMessage specified in the “waitingFor” method pops up.
Finally, the .withReuse(true) method is telling Spring to not recreate this container if it’s already running. Being an experimental feature, we can enable reusability by adding testcontainers.reuse.enable=true in a ~/.testcontainers.properties file. As an alternative to this, with Spring DevTools and the @RestartScope annotation, it’s possible to avoid completely the recreation of this bean if the application restarts. I prefer relying on the “reusability” of containers.
The config for the Redis TestContainer is pretty similar:
@Bean
@ServiceConnection(name = "redis")
public RedisContainer redisContainer() {

    final long memoryInBytes = 32L * 1024L * 1024L;
    final long memorySwapInBytes = 64L * 1024L * 1024L;

    return new RedisContainer(REDIS_IMAGE)
            .withExposedPorts(6379)
            .withReuse(true)
            .withCreateContainerCmdModifier(cmd -> {
                cmd.withName("redis");
                cmd.getHostConfig()
                        .withMemory(memoryInBytes)
                        .withMemorySwap(memorySwapInBytes);
            });
}
The main difference is that we need to specify the “name” of the service connection: the Auto-Config in this case works only if the Container is named “redis” and Redis is not providing a TestContainer library yet. That’s why we also need to expose port 6379 manually.
Now for the Flask App and the PythonContainer:
@Autowired
private ResourceLoader resourceLoader;
@Bean
// @ServiceConnection We don't need auto-connection in this case.
public PythonContainer pythonContainer() throws IOException {
Resource resource = resourceLoader.getResource("classpath:python/Dockerfile");
return new PythonContainer(
new ImageFromDockerfile().withDockerfile(resource.getFile().toPath()))
// 5000 is the standard port of Flask
.withExposedPorts(5000)
.withCreateContainerCmdModifier(cmd -> {
cmd.withName("flaskapp");
cmd.getHostConfig()
.withMemory(memoryInBytes)
.withMemorySwap(memorySwapInBytes);
});
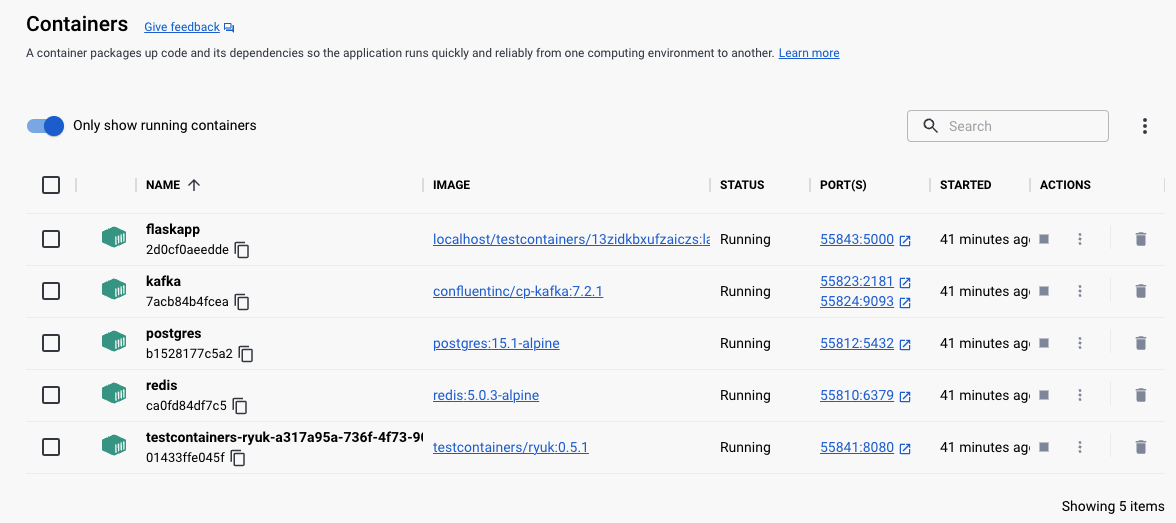
}In this case, we’ve built an image from a Dockerfile that is located in the test/resources folder. This is all the code we need to start our TestApplication. We just need to run ”./gradlew bootTestRun” and after some time we will see all docker containers started and ready, and the application ready to serve web requests.
Awesome!
Additional Configurations
Now for some additional sparkling configurations. In case of errors in an external Container, it might be difficult to reach and read the logs. TestContainers to the rescue!
With a simple configuration, we can see the logs of Kafka in the same output stream, even decorated with a prefix:
@Configuration
@Service
public class TestContainerLogConfig {

    private static final Logger LOGGER = LoggerFactory.
        getLogger(TestApplication.class);

    // We can Autowire it. Remember, we defined it as a @Bean!
    @Autowired
    private KafkaContainer kafkaContainer;

    @PostConstruct
    public void init() {
        Slf4jLogConsumer logConsumer = new Slf4jLogConsumer(LOGGER);
        logConsumer.withPrefix("KAFKA_CONT->");
        kafkaContainer.followOutput(logConsumer);
    }
}
Regarding the flask application, we are missing something.
Port 5000 is reachable only from the same network, and this should be good if the Spring Boot App was containerized as well. This is not the case. From the host’s perspective, TestContainer exposes .exposePort() on a random free port. While it’s possible to define a fixed port, this is made on purpose, to avoid port collisions.
What we can do is read the random port exposed by the container at runtime, and then set the appropriate system environment variable:
@Configuration
public class ExternalPortConfig {

    @Autowired
    private GenericContainer pythonContainer;

    @PostConstruct
    public void initPort() {
        System.setProperty("EXTERNAL_CUSTOMER_SERVICE_PORT", String.valueOf(
                pythonContainer.getMappedPort(5000)
        ));
    }
}
Conclusions
In this article, we have played a little bit with TestContainers in a heavily integrated SpringBoot app. We have seen the most important features and some additional configurations that could make life easier for developers trying to run applications on localhost.
As always, all code is available in this public GitHub repository.
Thank you for reading!